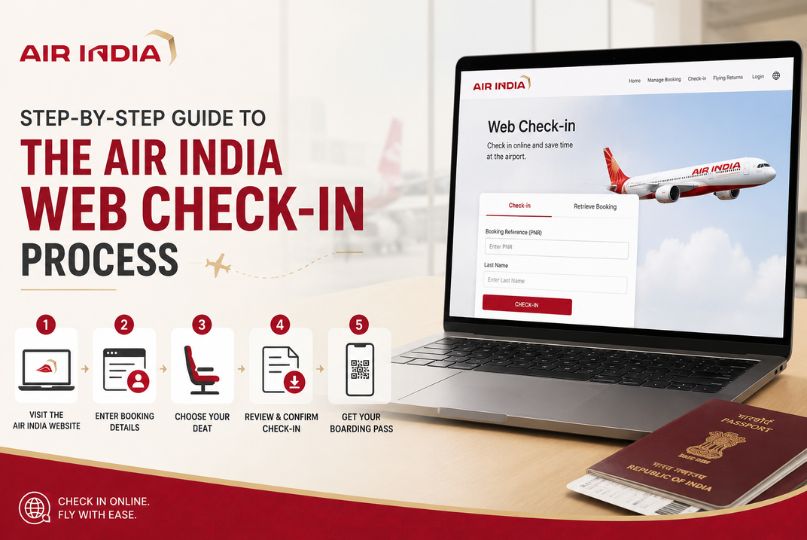
Travelling with Air India? Make your airport experience smoother by completing your Air India web check-in before you leave for the airport. Online check-in helps passengers save time, avoid long queues, choose their preferred seats, and receive a digital boarding pass within minutes.
Whether you’re flying within India or heading to an international destination, web check in Air India is a convenient way to begin your journey stress-free. In this guide, we’ll cover everything you need to know, including eligibility, check-in timings, seat selection, baggage rules, mobile check-in, common issues, and useful travel tips.
Why Choose Air India Web Check-in?
Air India is one of India’s leading full-service airlines, connecting travelers to hundreds of domestic and international destinations. To make the travel experience even more convenient, the airline offers Air India web check-in online, allowing passengers to complete the check-in process from the comfort of their home or office.
Some major benefits include:
- Skip long airport check-in lines
- Select your preferred seat before departure
- Download your boarding pass instantly
- Save valuable time at the airport
- Manage your booking with ease
- Enjoy a faster boarding experience
Most passengers can complete Air India web check-in starting 48 hours before departure, although timings may vary depending on the route.
What You’ll Need Before Starting Web Check-in
Before beginning the online check-in process, keep the following information ready:
- Air India Booking Reference (PNR) or Ticket Number
- Passenger’s Last Name
- Valid Government-issued ID
- Registered Mobile Number or Email Address
- Stable Internet Connection
Having these details ready ensures that the web check in Air India process is completed without interruptions.
Also Read- Step-by-Step Guide to the IndiGo Web Check-in Process
How to Complete Air India Web Check-in
The process is simple and usually takes only a few minutes.
Step 1: Visit the Air India Website or Mobile App
Go to the official Air India website or open the airline’s mobile application. Navigate to the Web Check-in section available on the homepage.
Step 2: Enter Your Booking Details
Provide your:
- PNR or Booking Reference
- Last Name
Make sure the details exactly match your booking confirmation.
Step 3: Select Your Flight
If your booking includes multiple flights, choose the sector for which you’d like to complete Air India web check-in.
Step 4: Verify Passenger Information
Review all passenger details carefully.
Check:
- Name spelling
- Contact details
- Frequent Flyer information
- Special assistance requests
If any information is incorrect, contact Air India customer support before completing check-in.
Step 5: Select Your Preferred Seat
During Air India web check-in online, passengers can choose seats based on availability.
Available seating options may include:
- Standard Seats
- Window Seats
- Aisle Seats
- Extra Legroom Seats
- Preferred Seats
- Emergency Exit Row Seats
Certain premium seat selections may require an additional fee.
Step 6: Add Optional Services
Passengers can personalize their journey by purchasing additional services such as:
- Extra baggage allowance
- In-flight meals
- Lounge access
- Travel insurance
- Priority services
Adding these services during check-in can often save time at the airport.
Step 7: Download Your Boarding Pass
Once you’ve completed Air India web check-in, your boarding pass will be generated instantly.
You can:
- Download it as a PDF
- Save it to your smartphone
- Receive it via email
- Print a physical copy
Always keep your boarding pass easily accessible during your journey.
Air India Web Check-in Mobile
Passengers who prefer using smartphones can complete Air India web check in mobile through the official Air India mobile app.
The app allows you to:
- Complete online check-in
- Download mobile boarding passes
- Select or change seats
- View flight status
- Manage bookings
- Receive travel notifications
Using the mobile app makes the Air India web check-in process even quicker while you’re on the move.
Air India Baggage Guidelines
Understanding baggage rules before your trip can help avoid unnecessary charges.
Cabin Baggage
Passengers are generally allowed:
- One cabin bag (subject to fare type)
- Personal item such as a handbag or laptop bag
Weight limits may differ depending on the route and travel class.
Checked Baggage
Checked baggage allowance depends on:
- Domestic or International route
- Cabin class
- Fare type
Always verify your baggage allowance before travelling.
Special Baggage
Passengers carrying:
- Sports equipment
- Musical instruments
- Oversized luggage
- Medical equipment
may need prior approval or additional payment.
Common Air India Web Check-in Problems
Although the process is straightforward, passengers may occasionally face certain issues.
Booking Not Found
Possible reasons include:
- Incorrect PNR
- Incorrect surname
- Attempting check-in outside the allowed window
Always verify your booking details before trying again.
Seat Selection Not Available
Preferred seats may already be occupied.
If this happens:
- Choose another available seat
- Try checking again later
- Seat assignment may occur automatically
Payment Issues
If purchasing optional services:
- Ensure your payment method is active
- Check internet connectivity
- Retry using another payment option if necessary
Special Assistance Services
Passengers requiring additional support should inform Air India before departure.
Services include:
- Wheelchair assistance
- Medical assistance
- Support for senior citizens
- Unaccompanied minor assistance
- Assistance for passengers with reduced mobility
Advance requests help ensure smoother travel arrangements.
Air India Web Check-in Timings
Check-in windows may vary slightly depending on your destination.
Domestic Flights
- Web check-in opens: 48 hours before departure
- Web check-in closes: 60 minutes before departure
- Airport check-in generally closes: 45 minutes before departure
International Flights
- Web check-in opens: 48 hours before departure
- Web check-in closes: 2 hours before departure
- Airport check-in generally closes: 60 minutes before departure
Always confirm the latest check-in timings for your specific flight before travelling.
Benefits of Air India Web Check-in
Completing Air India web check-in online offers several advantages:
- Faster airport processing
- Reduced waiting time
- Greater seat selection options
- Instant digital boarding pass
- Easier travel management
- More relaxed airport experience
For frequent travelers, online check-in has become an essential part of trip planning.
Helpful Travel Tips
To enjoy a smooth journey:
- Complete Air India web check-in as soon as it opens.
- Keep your boarding pass saved on your phone.
- Carry a valid government-issued photo ID.
- Check baggage limits before arriving at the airport.
- Reach the airport well before the reporting time.
- Monitor your flight status for any schedule changes.
Following these simple tips can help you avoid last-minute stress.
Conclusion
Using Air India web check-in is one of the easiest ways to simplify your travel experience. From selecting your preferred seat to downloading your boarding pass in advance, the online check-in process saves valuable time and helps you avoid unnecessary airport queues.
Whether you’re using web check in Air India, completing Air India web check in mobile, or choosing Air India web check-in online, checking in before reaching the airport ensures a more comfortable and hassle-free journey. Plan ahead, complete your check-in early, and enjoy a seamless travel experience with Air India.